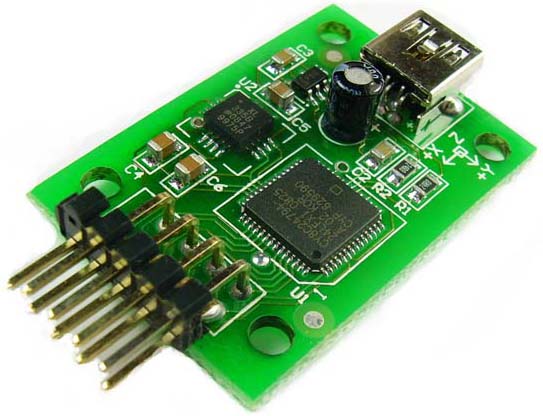
U-HID G
The U-HID-G has a three-axis accelerometer for sensing gravity and motion acceleration, plus it has a complete U-HID-NANO expansion port, configurable for buttons, keystrokes, further analog or quadrature.
It can serve as a gaming interface for flight controls, steering wheels, joysticks, pinball nudge, or whatever else you can think of that can be accomplished by sensing the acceleration that is reported by the U-HID-G to your computer. In addition to gaming, the U-HID-G may provide motion feedback for musical instruments, exercise equipment, alarm systems, and just about anything else that works based on motion.
Check out this page for a guitar motion sensor project
Motion sensing is available using two methods. The first is analog sensing. In this mode, the motion sensing appears as analog gamepad axes, X, Y and Z, to enable easy usage with standard PC applications which recognize game controllers. The sensing is fully adjustable using the calibration screen in the U-Config program.
The second mode is digital, in which a "nudge" of the sensor sends a keystroke or button signal to the PC. For each of the six nudge directions, a key or button can be configured. This mode is used, for example in pinball nudge detection. The sensitivity can be adjusted using the U-Config calibration screen, and you can set the detection so that a key or button is "pressed" for different orientations of the board if you have an application for this.
Although it is simplest and easiest to use the U-HID-G's accelerometer to sense angular orientation relative to the Earth's gravity field, it is also possible to measure the acceleration of motion or to use software that converts the acceleration data into velocity and distance information. Use two of them to make a drum machine that works without drums. Create a vehicle data logger that records acceleration, speed, and distance plus cornering g-force. Add dynamic expression to a musical instrument by varying the sound as the instrument is moved. Some example music-related applications have already been developed around this board and we will be featuring these soon.
These and a host of other applications are now possible and practical with the U-HID G.
Configuration
The 8-way port on the board is configured in the same way as the U-HID Nano, for keys, buttons, analog or quadrature inputs.
The on-board accelerometer is independent of the 8-way port but occupies the first three of the 8 possible analog axes. These axes can have calibration scale factor and offset applied in the normal way using the U-Config program. Axis 1 is X, axis 2 is Y and axis 3 is Z (vertical bar).
The board is shipped with a default calibration but for precision use, you will need to adjust the settings. Do this as follows:
Open Control Panel, Game Controllers.
Click on the U-HID device to show the gamepad test window. This displays a crosshair for X and Y , and vertical bar (the left bar) for Z.
Place the board in the orientation it will be mounted.
Open U-Config and go to the Calibration tab.
Adjust the Scale Factor slider to increase or decrease the sensitivity (moving left increases the sensitivity). Experiment with moving the board. Adjust the Offset slider to center the crosshair or vertical bar. (unless you need an offset applied for a special application in which case adjust as required). You will need to click "apply" each time the setting is changed.
Configuring Button/Key (nudge) Mode
You can configure "virtual switches" for sending signals to the PC when the board is moved in each of the six directions. These are configured in the J6 section of the U-Config program. Note that J6 does not exist as a physical connector on the board, this is for configuring these "virtual switches" only.
Switches and buttons are configured in the same way as a "real" switch, so that pulse, normally open or closed etc can be set.
Each directional nudge is assigned as follows:
|
X Left
|
J6 pin 3
|
|
X Right
|
J6 pin4
|
|
Y Left
|
J6 pin 5
|
|
Y Right
|
J6 pin6
|
|
Z Left
|
J6 pin7
|
|
Z Right
|
J6 pin 8
|
If any virtual switches are configured, the board switches to "auto-center" mode. This renders the Offset slider on the calibration screen inoperable. The centering of the sensor is set each time the board is powered up, or U-Config downloads a new configuration.
After configuring virtual switches,you will need to set the sensitivity. This is done using the U-Config program, calibration tab. Open this tab, and adjust the scale factor to the required setting. Moving the slider to the left increases the sensitivity. If you increase the sensitivity to a high level, the keys or buttons will be pressed when the board is oriented in specific directions. Lowering the sensitivity will create a button press on a "nudge" of the board. You can monitor the setting using Control Panel, Game Controllers, and open the device test window. |